How to Plan a Nursery Layout (Even in a Small Room)
The layout of a nursery is the decision that determines whether the room works. Not whether it looks right — colour, style, and decoration all contribute to how a room looks — but whether it functions correctly at 3 a.m. when you are holding a baby in one arm, navigating in darkness, and need to reach the changing station without tripping over a rug edge. A room that looks beautiful but is poorly laid out is harder to live with than a room that is simply arranged. A room that is well laid out and also beautiful is what this article aims to produce.
Layout planning in a nursery is constrained by three fixed factors — the room’s dimensions, the position of the door, and the position of the window — and three primary furniture pieces: the cot, the dresser or changing station, and the nursing chair. Getting the sequence right — understanding which constraints must be respected first and which decisions follow from them — is what separates a nursery that functions well from one that requires constant small workarounds.
This article works through that sequence in detail. It covers the principles that apply to rooms of any size, then addresses the specific constraints of small rooms, dual-purpose rooms, and rooms with awkward proportions. All principles described here are based on the physical requirements of the primary furniture pieces and the observable patterns of how a nursery is used.
Layout as the Primary Design Decision
In most interior design contexts, layout — the placement of furniture relative to the room’s architecture — is considered a structural decision that precedes decoration. In nursery planning, it is frequently treated as secondary: parents choose the furniture, order it, and then work out where to put it once it arrives. This reversal is the single most common source of nursery layouts that do not function well.
The reason layout deserves priority over furniture selection is that the room constrains the furniture, not the reverse. A cot that is 140 cm long needs 140 cm of clear wall space, plus 60 cm of access on both sides for an adult to reach into it comfortably — a total wall-and-floor requirement of approximately 260 cm before any other furniture is placed against the same wall. A dresser used as a changing station needs 60 cm of clear floor space on both long sides, and proximity to a nappy disposal unit and a power outlet for the baby monitor. A nursing chair needs 75 cm of clear space on both sides to allow comfortable feeding and, critically, the ability to stand from the chair while holding a baby without turning into a wall or another piece of furniture.
These are physical requirements. They do not flex to accommodate a room that has been decorated and furnished without measuring them first. The layout planning stage is the stage at which these requirements are reconciled with the room’s actual dimensions. Everything else follows.
“Choose the layout that makes the room work. Then choose the furniture that fits the layout. Never buy the furniture first and work out the layout after.”
→ What Is a Nursery Style? How to Choose the Right Look
The Three Primary Pieces and Their Spatial Requirements
A nursery contains many objects, but three pieces of furniture determine the layout of the room. Every other element — the shelving, the bookcase, the lamp, the wardrobe — is positioned around these three. Getting their placement right is the entirety of layout planning.
The cot: fixed constraints that take precedence
The cot is the largest piece of furniture in the nursery and the one with the most non-negotiable placement requirements. In order of priority:
Away from the window: Temperature fluctuation from draughts and direct sun exposure disturbs sleep and presents comfort risks. No cot should be positioned so that the sleeping surface is within reach of the window frame, or so that direct sunlight falls on the mattress at any time of day.
Away from direct heat sources: Radiators, underfloor heating outlets, and convector heaters create localised warm zones that cause overheating in a sleeping infant. Maintain a minimum of 50 cm of clear space between any heat source and the nearest cot surface.
Away from wall-mounted objects that could fall: Shelves, framed artworks, mirrors, and wall hangings positioned above the cot are falling hazards. No object should be wall-mounted directly above the cot sleeping surface unless it is fixed with appropriate wall anchors into studs, not plasterboard alone, and positioned so its lowest point is above the cot rail with additional clearance.
Against the interior wall where possible: An interior wall — one shared with another room, not an exterior wall — is the most temperature-stable surface in the room. It does not experience the thermal cycling of an exterior wall and is not subject to cold spots in winter. When no interior wall is available, positioning the cot away from the window and ensuring adequate window insulation is the practical alternative.
With these constraints observed, the cot position is typically determined: one wall of the room will satisfy all four requirements, and the cot is placed there. In small rooms where no single wall satisfies all four, the constraints are ranked in the order given above, and the position that satisfies the most constraints is chosen.
The dresser / changing station: function over aesthetics
The dresser used as a changing station is the second placement decision. Its requirements are less constrained than the cot but more specific than most parents expect:
Clear floor access on both long sides: An adult changing a baby needs to stand at the changing surface with room to turn, to reach forward over the baby, and to reach to the side for wipes, creams, and a clean nappy without leaning dangerously far from the baby. Approximately 60 cm of clear floor space on both long sides of the dresser is the minimum. A dresser placed with one side against a wall fails this requirement on that side.
Proximity to nappy disposal: A nappy bin positioned within arm’s reach of the changing surface means that the hand holding the dirty nappy never needs to travel more than 30 cm to dispose of it. This is relevant at every change but critical at night, when minimising movement and noise matters.
Near a power outlet: A baby monitor, a night light, and often a sound machine are positioned near the dresser or nursing corner. Placing the dresser near a power outlet avoids cable runs across the floor, which are both trip hazards and untidy.
Visible from the nursing chair: Not a hard requirement, but useful: an adult who can see the changing surface from the nursing chair can assess whether a needed item has been forgotten before standing up with a baby.
The nursing chair: overlooked and underplanned
The nursing chair is used more hours than any other piece of furniture in the nursery during the first year, and it is consistently the piece whose placement receives the least deliberate consideration. Three requirements determine its correct position:
Facing into the room, not toward a wall: An adult facing a blank wall during repeated night feeds and daytime settling sessions has a significantly different experience from one who can see the cot, the window, and the door. The chair should be positioned so that the seated adult faces the room’s interior.
Cot visible from the chair: The ability to see the cot from the nursing chair is practically useful during the transition phase of settling a child who is almost but not quite asleep. The line of sight from the chair to the cot should be unobstructed.
Standing clearance: The ability to stand from the chair while holding a sleeping baby without turning, twisting, or stepping into another piece of furniture. 75 cm of clear space on each side of the chair is the practical minimum.
→ Nursery Furniture: What You Really Need
The Layout Planning Sequence
The following sequence converts the principles above into a practical method for arriving at a specific furniture arrangement. It works for rooms of any size and should be completed before any furniture is purchased.
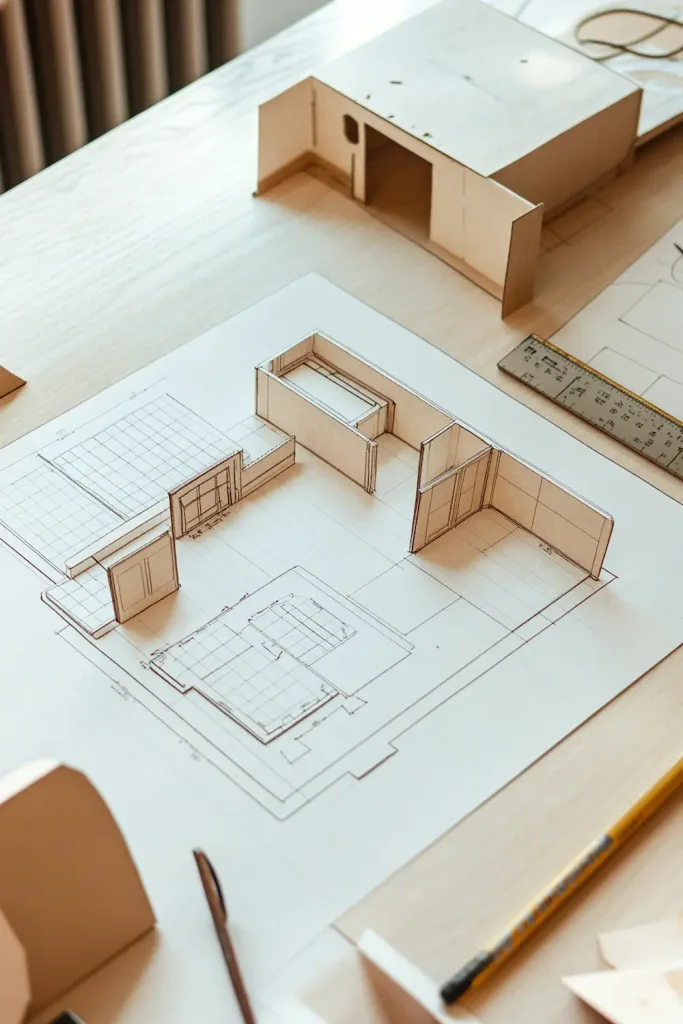
Step one: draw the room to scale
Measure the room accurately: length, width, and ceiling height; the position and width of the door (and which way it swings); the position and dimensions of each window; the position of any radiator or heat source; the position of power outlets; and any architectural features — a chimney breast, a built-in cupboard, an alcove — that project into the floor area.
Draw this on graph paper at a consistent scale (1:20 is practical: 1 cm on paper = 20 cm in the room). This does not need to be architecturally precise; it needs to be accurate enough that a furniture piece drawn at scale will correctly represent its footprint in the room. The single most common layout planning error is assessing furniture placement by eye in the room rather than on paper, which consistently underestimates the space furniture takes up and the clearance it requires.
Step two: cut out scale furniture templates
Measure each furniture piece you intend to use and cut out paper templates at the same scale as the room drawing. Include in each template not just the footprint of the furniture itself but its required clearance: a cot template should include the 60 cm access zones on both sides; a dresser template should include 60 cm on both long sides; a nursing chair template should include 75 cm on each side. These clearance zones are the space the furniture requires to be functional, not just present.
Move the templates around the room drawing and test different arrangements. This takes approximately twenty minutes and produces a specific, tested layout before any furniture is in the room. It is the most valuable twenty minutes spent in nursery planning.
Step three: place the cot first
Using the scale drawing and cot template, identify the wall positions that satisfy all four cot placement constraints: away from the window, away from direct heat, away from wall-mounted fall hazards, and ideally against an interior wall. There may be only one viable position. Place the cot template in that position.
Step four: place the dresser and nursing chair
With the cot position fixed, position the dresser template against the remaining walls, testing for the four dresser requirements: bilateral access, proximity to a power outlet, and line-of-sight from the nursing chair. Then position the nursing chair template in the remaining space, testing for facing direction, cot visibility, and standing clearance.
In most rooms of 10 square metres or more, a layout that satisfies all the primary requirements for all three pieces is achievable. In rooms smaller than this, some requirements will need to be ranked and the least critical deprioritised. The sections below cover the specific trade-offs that small rooms require.
Step five: allocate remaining wall space
With the three primary pieces placed, the remaining wall space is available for secondary furniture: the wardrobe or storage unit, the bookshelf, the floor lamp. These are placed in the remaining positions, assessed for their own clearance requirements (particularly the wardrobe, whose doors need clear space to open), and arranged to avoid narrowing the primary movement paths in the room.
The Floor Path: The Layout Element Most Often Overlooked
A nursery layout is not only a question of where furniture is placed. It is also a question of what is left between the furniture: the floor paths that connect the door to the cot, the door to the nursing chair, and the nursing chair to the changing station. These paths are navigated in complete or near-complete darkness multiple times each night during the first year. Their quality — their width, their freedom from obstructions, the absence of rug edges and low objects in them — determines the safety and practicability of the room at the hours when it matters most.
The three primary floor paths
Door to cot: The path used when entering the room to check on a sleeping baby, to resettle, or to lift the baby for a feed. Should be clear of any rug edge, toy, low stool, or other floor-level object. Minimum width: 70 cm. Should not require navigating around a furniture corner in darkness.
Nursing chair to cot: Used when transferring a settled baby from the chair to the cot. This is the path navigated while holding a sleeping baby and attempting not to wake them, which means no floor-level obstruction, no sticky rug edge, and a clear approach to the cot side. It is the most critical path in the room and should receive explicit assessment in complete darkness before the room is considered layout-complete.
Nursing chair to dresser: Used at night changes when the baby needs to be moved from the nursing chair to the changing station. Should not require stepping over or around any floor-level obstruction and should have adequate width for an adult carrying a baby.
Testing the floor paths
The definitive test for nursery floor paths is to navigate them in complete darkness with your eyes closed, at normal walking pace, for three consecutive circuits. Any obstruction encountered — a rug edge, a toy basket, a footstool leg — is an obstruction that will be encountered at 3 a.m. while tired and holding a baby. Resolve it before the room is in use, not after the first incident.
| ✔ Floor path assessment: do this before the room is considered finished Navigate the door-to-cot path in complete darkness at normal walking pace. Note any obstruction. Navigate the nursing-chair-to-cot path with your eyes closed, simulating the transfer of a sleeping baby. Navigate the nursing-chair-to-dresser path with eyes closed. Any rug edge, toy basket, low stool, footstool, or floor-level object in any of these paths should be relocated. The minimum clear width for any primary floor path is 70 cm. Reassess after any furniture rearrangement or addition of new floor-level objects. |
Dual-Purpose Rooms: When the Nursery Shares a Function
A nursery in a dedicated room is the simplest layout case. Many nurseries, however, share a room with another function: a guest bedroom, a home office, a study. The layout principles are the same, but the priority ranking of the two functions must be made explicit before any furniture is placed.
The priority rule for dual-purpose nurseries
The nursery function takes layout priority over the secondary function. The cot, the dresser, and the nursing chair are placed according to the nursery requirements described above. The guest bed or the office desk is placed in the space that remains. Not the reverse.
The practical implication: the secondary function may need to be compromised. A guest bed in a small shared room may need to be a sofa bed rather than a fixed single; a home office desk may need to be a fold-down wall unit rather than a freestanding piece. These are appropriate accommodations of a function that is used occasionally, in favour of a function that is used multiple times every day, including through the night.
Resistance to this priority rule — the instinct to place the guest bed against the best wall and work the nursery around it — is one of the most consistent sources of poorly functioning nursery layouts in shared rooms. The guest bed will be used perhaps a dozen times in the first year. The nursing corner will be used several thousand.
Visual separation of functions
In a dual-purpose room where two functions share a single space, visual separation — the clear differentiation of the nursery zone from the secondary zone — helps the room read as coherent rather than confused. This is achieved most simply through the rug: a large nursery rug that defines the nursery zone clearly, positioned under the cot, the dresser, and the nursing chair, creates a visual boundary that does not require any physical partition.
Curtains on a ceiling-mounted track — installed to divide the room at the point where the nursery zone ends and the secondary zone begins — are the most effective visual divider for rooms that must also block light and sound between the two zones. They are particularly useful in a shared office-nursery where daytime naps need to be protected from the light and noise of a working adult.
→ How to Mix Vintage and New Pieces in a Nursery
Small Rooms: Specific Strategies for Rooms Under 10 Square Metres
A nursery in a small room — under 10 square metres, or with one or more dimensions under 2.5 metres — requires specific layout strategies that a larger room does not. The primary challenge is satisfying the clearance requirements of the three primary pieces within a floor plan that does not naturally accommodate all of them with full bilateral access.
Strategy one: use a space-saving cot
Standard convertible cots are typically 140 cm long and 70 cm wide. Mini cots, or space-saving cot-beds, are typically 100 cm long and 50 cm wide — a floor footprint reduction of approximately 40%. The trade-off is a shorter usable life: a standard cot accommodates most children until approximately thirty-six months; a mini cot typically until eighteen to twenty-four months. For a room where the space saving of a mini cot makes the difference between a functional and an impractical layout, the trade-off is worth making. For a room where a standard cot is achievable with some layout compromise, it is not.
Strategy two: place the dresser against a wall with single-side access
In a small room, the dresser may need to be placed with one short end against a wall rather than with full bilateral long-side access. This is a layout compromise rather than a safety issue: a dresser accessed from one long side and one short side is functional, though less convenient than bilateral long-side access. The changing surface can still be reached from the open long side; the change is performed from that side only. The wall-adjacent side is used for storage access rather than for changing.
Strategy three: use the wall for storage rather than the floor
In a small room, every square metre of floor space is premium. Wall-mounted shelving, wall-mounted hook rails, and wall-mounted open storage units add significant storage capacity without any floor footprint. A wall-mounted shelf above the dresser — at adult reach height, not within reach of the cot — provides the storage for changing supplies, creams, and spare bedding that a floor-level unit would require floor space to provide.
The practical ceiling: wall-mounted storage above a certain height (approximately 150 cm from the floor) is not accessible during a change without putting the baby down. Keep the most-used items at accessible height; use higher shelves for reserves and less-frequently-needed supplies.
Strategy four: choose furniture that doubles
In a small nursery, every piece of furniture should serve more than one function where possible. A dresser with a changing top serves both storage and changing functions; a nursing chair with storage under its seat serves both seating and small-item storage; a cot with a drawer in its base provides under-cot storage without any additional floor footprint. The ottoman or footstool beside the nursing chair should have a hinged lid and internal storage. The bookshelf beside the dresser should have a depth of at least 30 cm, usable for larger items as well as books.
| → Small room layout: the four non-negotiables The cot placement constraints (away from window, heat, and fall hazards) apply in a small room exactly as in a larger one. Do not compromise these to gain floor space elsewhere. The floor paths remain the priority: door to cot and chair to cot must be clear regardless of how tight the overall layout is. Wall-mounting all non-essential storage is the single most effective space-saving measure. A mini cot is appropriate when the room genuinely cannot accommodate a standard cot with its required clearances. It is not a default choice for convenience. |
→ Small Nursery Layout Tips & Space-Saving Hacks
Small nursery layout schematic — approximately 2.5 × 3 metres
Read each cell as a zone in the room. Door opens from the bottom-left cell.
| WINDOW (cordless blackout blind + linen curtains) | COT against interior wall away from window + heat | DRESSER + changing mat wall-mounted shelf above |
| Clear floor path door → cot 70 cm minimum | RUG anchors nursery zone non-slip underlay | Clear floor path chair → dresser 70 cm minimum |
| DOOR (opens inward, against this wall) | Clear floor path chair → cot 70 cm minimum | NURSING CHAIR faces room + cot 75 cm standing clearance |
Awkward Rooms: Alcoves, Chimney Breasts, and Angled Ceilings
Most nurseries are not rectangular rooms of standard proportions. They have features — chimney breasts, alcoves, angled ceilings, dormer windows, load-bearing walls with odd projections — that complicate the placement of rectangular furniture against what should be flat walls. Each of these features requires a specific response.
Chimney breasts
A chimney breast projecting into a room creates two recessed alcoves on either side. These alcoves are the most useful structural features a nursery can have: they provide defined, depth-limited spaces that suit a dresser or a bookshelf precisely. A dresser fitted into a chimney alcove is visually anchored by the alcove walls, leaves the main wall expanse open, and has a reduced clearance requirement because the alcove walls define the sides of its footprint. The cot should never be placed against the chimney breast face itself — chimneys retain and release heat in ways that are inconsistent with stable cot temperature.
Alcoves and recesses
Alcoves that are not chimney-related — a recess created by a structural wall, a built-in wardrobe space that has been partially converted — are useful for secondary storage but typically not deep enough for the cot or dresser. An alcove of 35 to 45 cm depth is correct for a wall-mounted shelf unit or for a compact bookshelf. An alcove of 60 cm or more is correct for a dresser.
Angled ceilings and dormer windows
In a room with an angled ceiling — typically a converted loft or attic room — the usable vertical space varies significantly across the floor plan. The cot requires full headroom directly above it: the lowest point of any ceiling surface directly above the sleeping area of the cot should be at least 150 cm above the mattress surface, to ensure that a standing adult reaching into the cot is not working in a constricted space. The practical consequence: in rooms with steeply angled ceilings, the cot is almost always restricted to the central floor area under the apex, regardless of where other placement constraints would otherwise position it.
Angled ceiling sections are, however, ideal for the nursing chair: a chair positioned under a low section of ceiling does not require full overhead clearance, and the enclosed quality of a low-ceilinged corner is often experienced as particularly comfortable for feeding. The lower section of an angled-ceiling room that would be unusable for the cot or dresser can be the most pleasant location for the nursing chair.
The Most Common Nursery Layout Errors
The following errors appear consistently in nursery layouts that look correct in photographs but function poorly in daily use. All are more easily avoided in the planning phase than corrected after the room is in use.
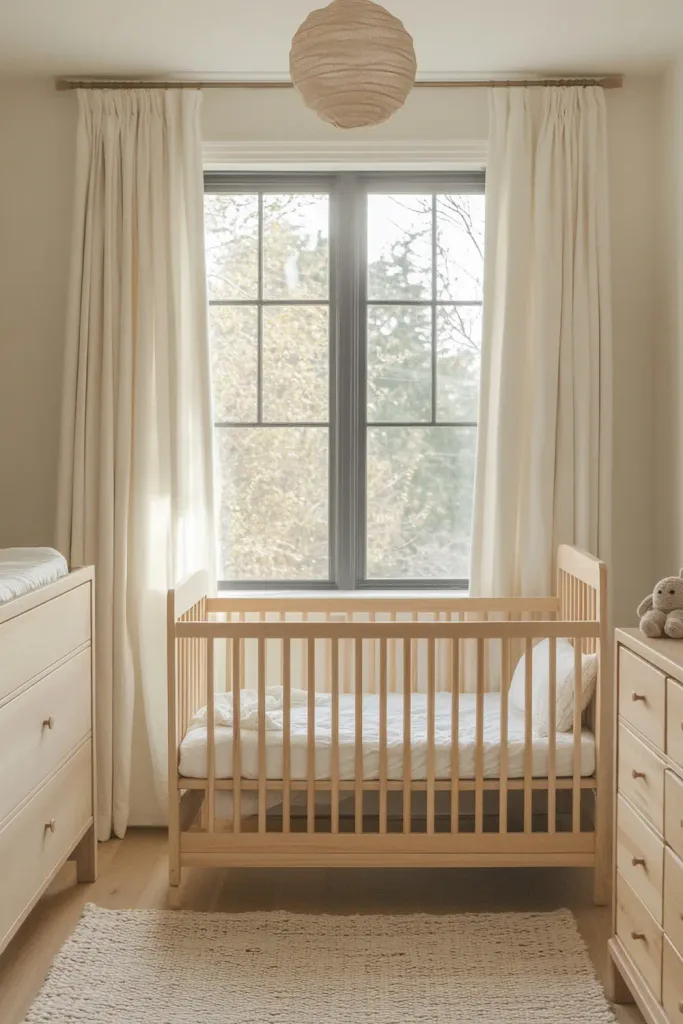
Placing the cot against the window wall for aesthetic reasons. The window wall is often the most visually appealing position for the cot — it creates a photogenic composition with the curtains framing the cot from above. It is also the position most affected by draughts, temperature fluctuation, and direct light. The aesthetic benefit does not offset the functional cost.
Placing the nursing chair facing a wall. A nursing chair facing a blank wall is a common error in rooms where the layout has been designed for visual symmetry rather than for function. The adult who will sit in this chair for thousands of hours does not benefit from visual symmetry. They benefit from a view of the cot, the door, and ideally the window.
Buying a large rug and placing it before testing the floor paths. A rug that is sized correctly for the room on paper but that extends into the primary floor paths creates edges that are navigated in darkness. Place the rug after the floor paths have been tested and confirmed, and verify that the rug edges do not fall within any primary path.
Not measuring the door swing before buying furniture. A door that opens inward into the room describes an arc across the floor. Any furniture placed within that arc is struck by the door each time it is opened. This is most commonly a problem with the first piece of furniture placed near the door — a bookshelf, a small wardrobe, or a toy storage unit — and is entirely avoidable by measuring the arc on the floor plan before purchase.
Placing the dresser against a wall with no room for bilateral access. A dresser pushed hard against a side wall with no floor space on the left side requires the adult to reach across their own body during changes — an unstable position with a baby on the changing surface. The clearance requirement on both long sides is not an aesthetic preference; it is a stability requirement.
Treating layout as a problem to solve after the room is furnished. The most common and most consequential error. A room that is fully furnished and then assessed for layout is a room whose layout is constrained by purchases that cannot be easily returned. Layout is the first decision, not the last.
→ Mistakes to Avoid When Designing a Nursery
Where to go next
A correctly planned layout is the framework on which every other nursery decision rests. The furniture choices, the style direction, the colour palette, and the decorative layer all operate within the layout and are constrained by it. The articles below develop the decisions that follow from a sound layout: what furniture to select, how to make a small room work harder, and the specific mistakes that undo an otherwise well-considered nursery.
→ The Complete Baby Nursery Design Guide
→ What Is a Nursery Style? How to Choose the Right Look
→ Nursery Furniture: What You Really Need
→ How to Mix Vintage and New Pieces in a Nursery
→ Small Nursery Layout Tips & Space-Saving Hacks
→ Mistakes to Avoid When Designing a Nursery